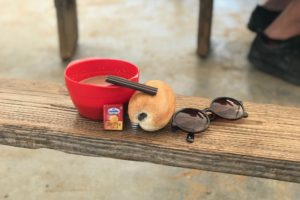
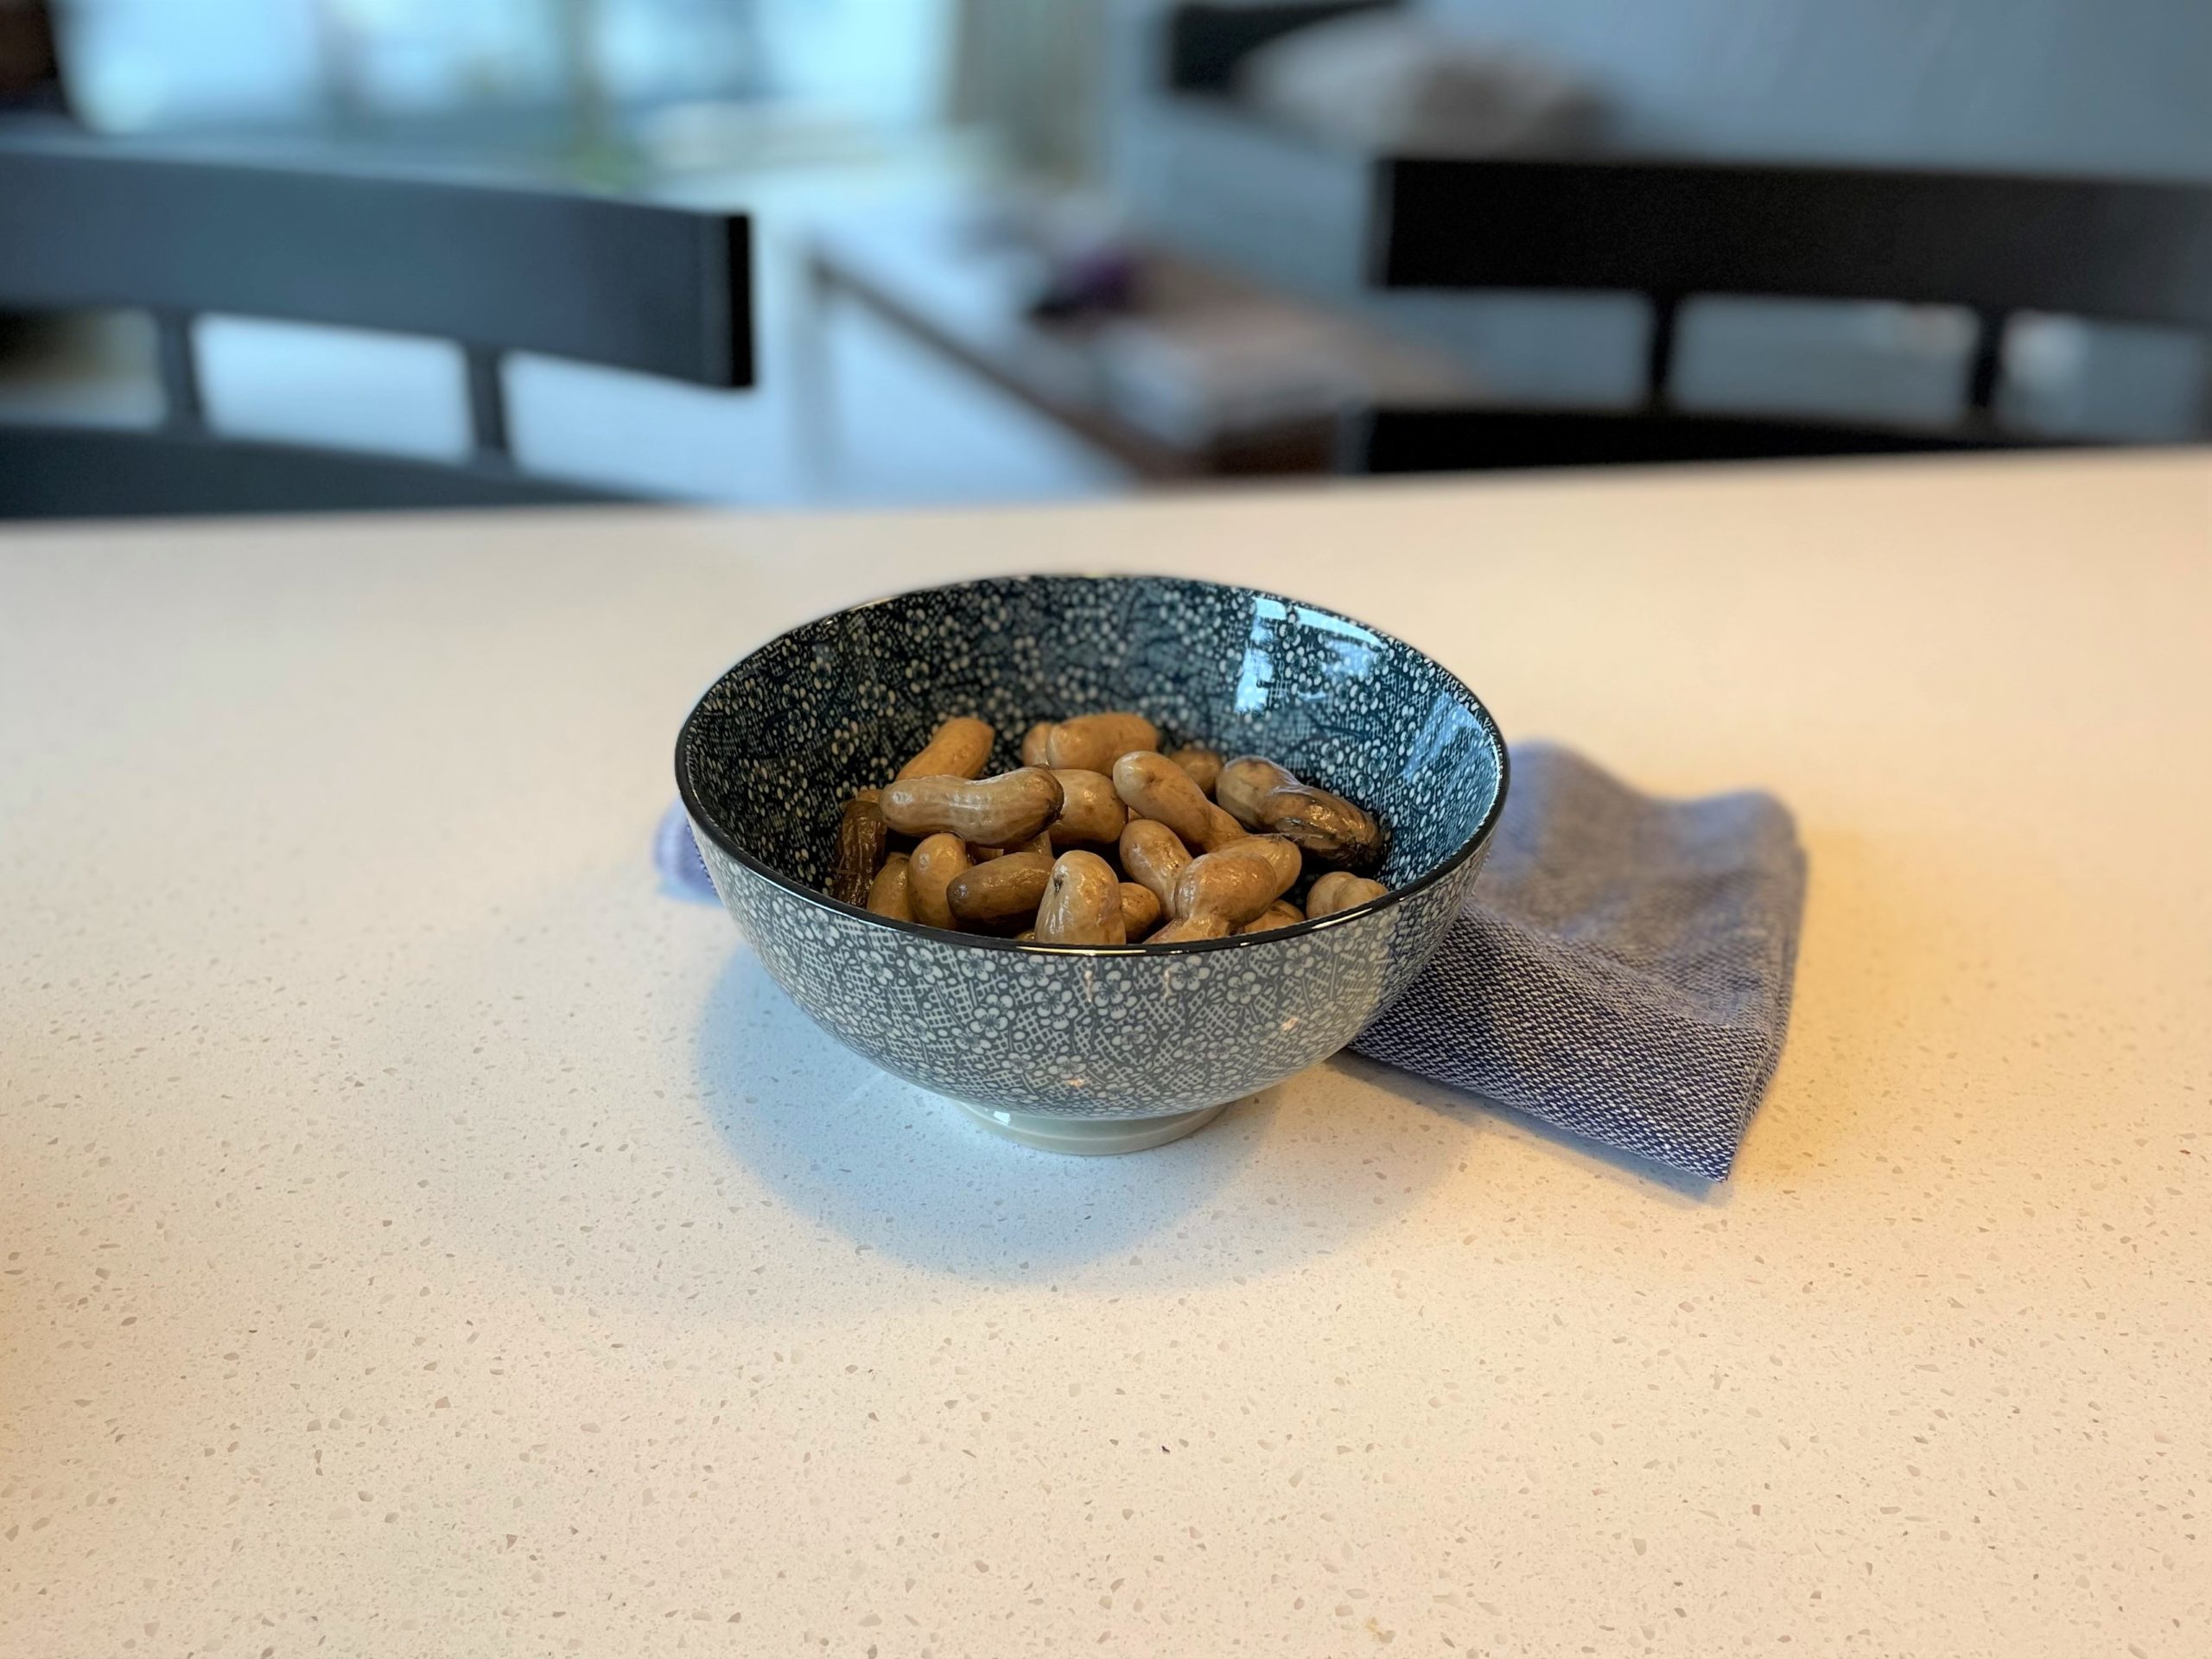
Caramel Crunch Cookies


I talk a lot on this blog about jobs– looking for jobs, losing jobs, maybe not being so crazy about jobs.  But let’s talk for a moment about quitting jobs.

“Quit” is such a bad word; it still conjures up images of softball games from my nonathletic childhood.  But in terms of work, it seems so much worse.  I can just hear all these judgmental voices in my head saying, “Oh, so you’re just going to quit a job in the middle of a bum economy?  And for what– because you just didn’t like it?  Too tough for you?  Couldn’t take the hard work?  Too soft for physical labor?”

Well, you know what?  Those judgmental voices don’t know my life.  Sometimes you simply know that something isn’t working out for you, and that’s fine.  It just happened that in this situation, I had three other jobs I was doing simultaneously, which afforded me the luxury of dropping one.  And let’s be real– what kind of crazy person attempts to work four jobs at once?

Well, honestly, I had every intention of doing just that.  I handed in my notice in the first place because I was almost certain I had another exciting opportunity coming down the pike.  I found out at the last minute–like, the next-to-last day of my two week notice– that it wasn’t going to work out, like so many other exciting opportunities this year.  But by that time, I had already decided that one less job might not be such a bad thing anyway.  And really, there’s no use wasting energy being depressed about the job that didn’t work out.  There are cookies to distract us from that.

These, like other recent kitchen projects, were the result of an ill-advised snack choice.  Doesn’t Caramel Crunch Trail Mix sound like such a good idea?  I don’t know why, but it just wasn’t working for me on its own.  But I could tell right off the bat that it would make for some excellent cookies.

Of course, when I started collecting ingredients, I realized that I didn’t have any brown sugar.  This could have been incredibly frustrating, but fortunately, I remembered reading in the Joy the Baker cookbook that you can make your own out of white sugar and molasses.  It might seem unlikely that one would have molasses on hand, but not brown sugar, but clearly, it happens.

All it takes is two tablespoons of molasses to one cup of brown sugar.  You mix, mix, mix with a fork, and ta-da, it’s fluffy brown sugar!


The trail mix in these cookies is just a simple mix of peanuts, almonds, and mini chocolate caramel cups.  I found the trail mix at CVS, but it would be easy enough to assemble your own.  I roughly chopped the nuts and left the caramel cups intact.  Since there are some big chunks in these cookies, my normal tablespoon measure didn’t seem quite large enough.  I just eyeballed the proportions; each cookie was probably about a tablespoon and a half of dough.

Normally, I get really angry when my cookies spread out in the oven.  I might have mentioned this before.  That’s what happened with these cookies, too, but in this case, I loved the results.  They were still chewy and soft in the center, with a little crunch on the edges.  See for yourself!

And, naturally, since they included salted nuts, the cookies had the perfect salty hit to complement the sweet chocolate and caramel.  If that’s not enough to make you silence the judgy voices, forget your disappointments, and keep on fighting, I don’t know what is.

Caramel Crunch Cookies
adapted from the Modern Baker 

1 1/2 cups all-purpose flour
1/2 teaspoon baking soda
1/2 teaspoon salt
10 tablespoons unsalted butter, softened
3/4 cup brown sugar, firmly packed
1 teaspoon vanilla extract
1 large egg
1 bag CVS caramel crunch trail mix (or a mixture of 1/4 cup salted peanuts, 1/4 cup salted almonds, and 1/4 cup mini caramel cups)

1.  Preheat oven to 350° F.

2. Stir the flour, baking soda, and salt together and set aside.

3. Combine the butter, brown sugar, and vanilla in the bowl of an electric mixer.  Beat with the paddle on medium speed until just mixed, then beat in the egg.  [The Modern Baker specifies that overbeating will make the cookies rise and then flatten out during baking.]

4. Remove the bowl from the mixer stand and use a large rubber spatula to mix in the flour mixture, then the trail mix.

5. Drop the dough in equally-sized spoonfuls on a baking sheet lined with parchment, leaving space in between to allow for spreading.  Bake the cookies for about 15 minutes, until golden.


Posted in Uncategorized | 2 Comments

Spicy Shrimp Scampi

I’ve probably given the impression on this blog that I eat a lot of shrimp.  True, this is only the third time I’ve presented them, but given how small my blog is, and how much of it is focused on sweets, that’s still a lot of shrimp.  The truth is that shrimp are a treat—a “sometime food,” if you will—but I love them so much that on the occasions when I do make them, I just feel like I have to blog about them.

[Sidenote: I’m not in any hurry at all to have kids, but I fully expect watching Sesame Street with the young’uns to be one of the best parts of parenthood.  I challenge you to name another show that introduces kids to nutriton and Porgy and Bess simultaneously.]

This recipe is one my dad made frequently when I was younger.  I wouldn’t really call it an authentic scampi; it has the requisite garlic, butter, and white wine, but it’s also dressed up with a few other key ingredients, notably chipotle peppers.  And while I recognize that a distinctive feature of traditional scampi is the pool of butter in which the shrimp swim, I use about half the amount my dad’s version calls for.  I can see him huffing and puffing right now, saying something like, “You need all that butter!  Grease keeps your joints oiled up!”  But you know what?  I stand by my lightened version.  It’s delicious.

Of course, when a recipe starts with fresh minced garlic and herbs, it’s bound to be delicious.

Here are the magic ingredients that give this recipe its punch: Worcestershire sauce, spicy mustard, and canned chipotle peppers.  It occurs to me that the original recipe calls for Creole mustard, which is not the same thing, but I always have spicy mustard on hand, so it stands in.  Maybe I’ll try to get my mitts on some Zatarains, if I can find it in Boston.

Pick a nice, dry wine to go in the scampi.  It’ll also pair well with the finished product.

A final point about this dish: the type of pasta you choose makes a surprising difference here.  In the initial photo (from about two years ago), I used linguine.  In the photo at the bottom, I used tri-color rotini.  The advantage of the linguine is that it looks more elegant.  The rotini, however, is great because it has plenty of nooks and crannies to catch the sauce.  If I can figure out where on earth to find it, this fusilli looks like it would be just the solution.

In the meantime, just pick your pasta and dive on in here.  Treat yourself to some shrimpy goodness.


Spicy Shrimp Scampi

2 tablespoons olive oil
2 cloves fresh garlic, minced
1 to 2 tablespoons chopped chipotle peppers in adobo (Dad says, “1 tablespoon will be hot, 2 will be dynamite.”)
1.5 pounds shrimp
1 tablespoon creole or spicy mustard
1 tablespoon Worcestershire sauce
1/4 cup dry white wine
1/2 stick (4 tablespoons) butter
1/4 cup chopped fresh parsley
1/2 cup fresh-grated parmesan cheese
1 package pasta of your choice, cooked

Heat the olive oil over medium heat in a large frying pan or wok.  Saute the garlic and chipotle peppers in the hot oil.  After about 3 minutes, add the shrimp and cook for 3 or 4 minutes more, until the shrimp just turn pink.

Remove shrimp and set aside.

Add the mustard, Worcestershire sauce, and wine to the pan; cook for about 3 minutes, stirring constantly.  Return shrimp to pan, and add the butter and parsley.  Cook for about 2 minutes, until butter has completely melted.

Pour the mixture over prepared pasta, add the parmesan cheese, and stir.  Garnish with extra parsley and grated parmesan.

Posted in Uncategorized | Leave a comment

Banana Fudge Brownies

I’ve had plenty of practice lately with turning life’s lemons into lemonade.  Don’t worry, I’m not about to talk about jobs or money—I’m going to talk about freeze-dried bananas.

As I might have mentioned before, I have a weak spot for less-than-healthy snacks.  Banana chips have been at the top of my favorite unhealthy food list for a while.  Granted, there are many worse things than banana chips, but they are fried and full of oil, and while that’s never stopped me before, there’s also nothing wrong with looking for a healthier alternative.  So when I spotted freeze-dried banana chips (sole ingredient: bananas) on the shelf at Target, it seemed like a good idea to pick them up.

It was absolutely not a good idea.  I took one bite and immediately wanted my $2.50 back.  It wasn’t so much that they tasted bad (although they tasted very ripe, and I weirdly prefer my bananas with a little green still on the skin), but the texture was unbearable.  It was like biting into a sticky packing peanut.

So there I was, stuck with a snack I was never going to eat, and out $2.50.  Ok, I’m going to talk about money a little: every little quarter counts these days.  That doesn’t mean I don’t sometimes shell out an unreasonable two dollars for a simple cup of coffee, or something equally unnecessary, but I don’t want to just throw away money, either.  I really felt the pressure to figure out some other use for these bananas.

I have a secret to share with you: I also had a batch of homemade cheese on my hands that I didn’t really want to eat.  I know; I told you it tasted good.  And it did… but it tasted more like sour cream than cheese, and while I’m a huge fan of sour cream, no one really wants to spread that on a bagel.

The solution for this problem came to me from The Modern Baker.  I adore this book.  It doesn’t just give you recipes; it really teaches you how to bake.  I actually have The Modern Baker to thank for showing me how to solve my cookie problems.

As I was flipping through it a few days ago, just for kicks and giggles, I spotted a recipe for sour cream brownies.  It occurred to me that this might be just the thing for getting rid of my homemade cheese—and then I realized that it would also be perfect for those stupid freeze-dried bananas!  If everything went according to plan, the moisture of the batter would rehydrate the bananas, and then the heat of the oven would break them down entirely.  And by golly, that’s just what happened.  The final product was the most deliciously moist brownie I’ve ever had, with a kick of banana flavor, but no noticeable fruit chunks.  Problem deliciously solved!

Bad decision (bananas), meet good decision (book).

Most of the brownies I’ve ever made came from a box, but it’s hard to argue with a recipe that begins with melting butter and chocolate chips.

And, when you stir your melted chocolate into the batter, you get a psychedelic chocolate swirl.  Unbeatable.

I don’t have a kitchen scale, so measuring out the chocolate for the brownies was a little tricky.  I eyeballed it, but after tasting my batter, I decided I’d underestimated, so I tossed in some cocoa powder until it tasted like I wanted it to.

And, finally, in went those crazy dried bananas.

Note to self: never look away while pouring brownie batter into the pan.  You will miss the pan.  Any ideas on how to get brownie batter out of that black hole underneath the burner?

 
And there’s the story of how I took a big, fat, bad snack lemon and turned it into delicious, chocolatey lemonade.  Wait, what?

What’s that saying– “Bad food decisions are the mother of invention”?  No? Maybe it was “avoid freeze-dried food unless you’re about to launch into space or hike the Appalachian Trail.”

Well, I’m just glad it worked out this time.

Banana Fudge Brownies
adapted from The Modern Baker

6 ounces (1 1/2 sticks) unsalted butter
7 ounces bittersweet chocolate
1 3/4 cups brown sugar, firmly packed
4 large eggs
1/2 cup soft, unripened cheese/farmer’s cheese (or store-bought sour cream)
1/2 teaspoon salt
3 teaspoons vanilla extract
1 1/2 cups all-purpose flour
2 large handfuls of freeze dried banana slices (or 2 fresh ripe bananas, sliced)

Preheat oven to 350 degrees.  Put the butter in a medium saucepan and place over medium heat.  Let the butter melt, stirring occasionally, then allow it to bubble for about 10 seconds.  Remove the pan from the heat and add chocolate; whisk until smooth.

Place the brown sugar in the bowl of an electric mixer.  Beat in 1 egg on the lowest speed; add the remaining eggs, one at a time, beating until smooth after each.  Add the cheese (or sour cream), salt, and vanilla, and beat until smooth.

Remove the bowl from the mixer and use a rubber spatula to mix in the chocolate and butter mixture.  Add the flour, and then add the banana slices.

Scrape the batter into a 9×13 baking pan, coated with cooking spray.  Bake until the brownies are firm, but still moist in the center, about 30 minutes.  Cool the brownies on a rack before serving.

Posted in Uncategorized | Leave a comment

Making Cheese

There are some kitchen projects that are completely easy and unintimidating, like quick pancakes or no-cook pesto.  There are some that can be a bit more labor-intensive, but still fun and calming, like yeasted bread.  And then there are some that scare the pants off me.  This is one of the scary kind.

I’ve wanted to learn how to make cheese for years, since my kitchenless dorm days, at least.  But somehow, I’ve never gotten around to it until now.  And by “I’ve never gotten around to it,” I mean, “I’ve been dodging the task.”  For a while, my excuse was that cheese making supplies were hard to find.  There was a place in Somerville that I knew sold everything I needed, but come on, it was allll the way at the end of the red line, and then a lonnnnng walk from the T stop.  Like, a whole mile!  Yes, I knew that all my necessary supplies were also readily available online, but who has the money to fork over for shipping and handling, am I right?

Then, last summer, I found myself working once a week at a farmers market that was about a 10 minute walk from that shop in Somerville.  But I found a summer’s worth of excuses and still didn’t go.

Finally, as I was wandering the aisles of Harvest Co-op last month, I found it: a tiny bottle of rennet staring me down…judgingly.  So, naturally, I snapped it up, took it home, and promptly ignored it for another several weeks.

What was my hangup with this cheese making thing?  It’s been at the top of my to-do list for ages.  I’ve borrowed the public library’s copy of The Home Creamery so many times they practically keep it on a special shelf for me.  I’ve toyed with the idea of applying for a job on a goat farm as a cheese making apprentice.   What kept me from just rolling up my sleeves and giving it a go?

Perhaps it was a certain sense of foreboding, the thought that this could be either one of my greatest kitchen triumphs, or a total train wreck.   Of course, like most first attempts at anything, this one fell somewhere in the middle.  It was about equal parts exciting and frustrating, and while I was mostly thrilled with the final product, there was still a twinge of disappointment that it hadn’t turned out just exactly like I’d expected.  But the important thing is that I finally buckled down and gave it a shot—and I deemed the results blog-worthy.

The first big surprise I encountered was how long it takes to heat a gallon of milk to 180 degrees.  Granted, you could probably do it in no time at all over a high flame, but I remember one of my earliest attempts to use the stove when my parents weren’t around, and it ended with an incredibly scalded pan of milk, and I don’t have much desire to experience that again.  Slow heating is the way to go.

Second surprise: it takes almost as long to let the milk cool down again to the point where you can add the rennet.  I don’t know as much as I probably should about the science of cheese making, but I assume the idea here is to heat the milk enough to kill any potentially harmful bacteria, and then cool it enough to not kill the rennet.  At any rate, this whole heating and cooling process took me about an hour, but after that was done, in went the rennet, diluted in water, and a bit of buttermilk (its cultures help to kickstart the whey/curd separation process).

Surprise number three, which honestly should not have been a surprise at all: things often take longer than you think they will.  That’s why it’s unwise to try anything new and potentially complicated when you’re on a fairly fixed schedule—but if you’re like me, and your entire life is a fixed schedule, then this is just something you’ll have to roll with.  My recipe suggested that the curds and whey would separate in 12 to 18 hours, so I cooked, cooled, and rennet-ed the milk late one afternoon when I knew I’d have a few hours to work with the next morning.  Then, 12 to 18 hours later, when I uncovered my cheese pot, what I found was certainly not curds and whey, but something resembling lumpy milk.

So what to do?    It seemed that things were progressing as they should, albeit much more slowly, but I had to get ready for work in about two hours.  I had no idea if it was safe to leave the whole mess out at room temperature all day, since I wouldn’t get home again for hours, but I figured it was better to give it a shot than to let the whole thing—time, ingredients, effort—go to waste.

Fortunately, when I got home that night and checked in again, the cheese had progressed just as the recipe said it would.  (I took a picture of the curds with the whey on top… but I’m not so sure you want to see that.)

Fourth and final surprise: the cheesecloth in my pantry was quite possibly cut in the most useless shape for cheesemaking I could imagine.  My cheesecloth was several feet in length, but impossibly narrow, and wrapped mummy-style around a piece of cardboard.  The idea was to drain off as much of the whey as possible, spoon the curds into your cheesecloth, and tie it up into a poultice… but when you’re dealing with about a nine-inch width of cloth, that’s practically impossible.  Just look at it folding over pathetically.

Once again, my fine-mesh sieve saved the day.  It was fine enough to keep the curds from falling through, and fit just perfectly on top of an empty bowl, allowing for excellent draining.  Seriously, I think my sieve deserves a place of honor in the kitchen, maybe on a gold-plated, jewel-encrusted hook.  I’ll get right to work on that.

Finally, finally, after two bewildering days of cheese making, I ended up with what you see in the first photo.  After some vigorous whisking, it looked more like this:

I really and truly made cheese.  It tasted good!  It looked good!  It was especially tasty when mixed with honey and spread over a crumpet.

And now that I’ve knocked out that awkward first attempt, I’m all the more anxious to jump in again, correct my mistakes, and take on even more recipes.  Take that, to-do list!

Swiss Style Cream Cheese
(This is a recipe that came with my bottle of rennet)

1 gallon skim milk
1/4 cup buttermilk
1/2 cup water
5 drops liquid rennet

Heat milk to 180 degrees F.  Dilute liquid rennet in water.  Let the milk cool back to 85 degrees F, add buttermilk and rennet solution, and stir well.  Cover with a towel and leave at room temperature for 12 to 18 hours (ha!) until firm curd forms and whey appears on the surface.

Gently lift curd with a large spoon and place in a bowl lined with cheese cloth or special dairy cloth.  Lift four corners of the cloth and tie them together with kitchen twine; hang above the sink to drain for 2-3 hours, or until most of the whey has drained.   (Or use a fine-mesh sieve if your cheesecloth is weirdly shaped, and let it drain over a bowl.)

Place cheese in a bowl, add salt, and whisk until smooth.

Posted in Uncategorized | 1 Comment

Chocolate Chip, Pistachio, and Cherry Cookies

I remember the very first time I made cookies by myself.  I don’t remember exactly how old I was, but it was during a break from school, and I was home alone, so I was obviously at that golden age where I no longer required child care but was still too young to get a job.  I had a hankering for cookies, but we didn’t keep a lot of store-bought sweets around the house, and I didn’t have a driver’s license, so I had no choice but to make my own.  I wasn’t about to use my mom’s electric mixer, for fear of breaking it, so most of the cookie recipes I found in our stack of cookbooks were out of the question.  But then, in a spiral-bound paperback cookbook from some old church event, I found it—a sugar cookie recipe which not only called for the dough to be mixed by hand, but used self-rising flour.  There was no way I could mess that one up!

I remember how proud I was when those cookies turned out beautifully.  I was so excited that I also dug up a frosting recipe, whipped up a batch, and gave each cookie a generous dollop.  I couldn’t wait for my parents to come home and see what I’d done—and that I hadn’t burned the house down in the process.

To this day, cookies are still my favorite things to bake, and my weirdo brain is constantly coming up with ideas for new cookies when it should be focusing on other things; my very favorite recipe, which I hope to share here soon, is one that I dreamed up in chemistry class during college.  This recipe is less the result of divine inspiration and more an amalgamation of a trusty recipe and my favorite recent pantry items.

The key ingredient in these cookies is browned butter.  Browned butter should be every baker’s secret weapon; it has the power to take just about any dessert from good to great.  And, it should be noted, browning butter will make your kitchen smell delectable.

Other than the browning of the butter, the dough comes together much like any other cookie dough: with sugar, eggs, and a flour mixture.  After your dough is mixed, throw in some (read: tons of) chocolate chips, a handful of dried sour cherries, and a smaller handful of pistachios.  It’s such a festive, colorful combination!

I find that a tablespoon is the perfect measure for cookie dough.  Just pack the dough into the spoon and drop it onto a pan lined with parchment.  Your cookies will be uniform and beautiful.

Sidenote: I really struggled with cookies for a while after moving to Boston and trying to bake with a gas oven for the first time.  My cookies always, always flattened out and stuck to the pan, no matter how much cooking spray I used, or how I tweaked the recipe.  I huffed and puffed and threw—not dropped, not tossed, but threw—a lot of cookies in the trash for a couple of years.  And then I tried lining my baking sheets with parchment paper.  And what d’you know, it worked.  Those cookies just slide right off.

I think the best thing about a fresh batch of cookies is that they’re so incredibly shareable.  Roommates and families and friends all love fresh-baked sweets, and incidentally, so do strangers.  Obviously, you can’t really go around these days giving mysterious bags of sweets to random people—at least, not without getting the authorities involved—but I’m sure everyone has a number of semi-strangers in their lives whose days would be brightened by a small, delicious gift.  I suggest the tailor who occasionally alters your clothes and always waves when she sees you pass by her shop, the barista who pours your morning coffee, or that guy who’s always standing on the same corner outside of Trader Joe’s selling Spare Change News.

But share the love quickly, before you give in to the temptation to scarf them all down yourself.


Chocolate Chip, Pistachio, and Cherry Cookies

1 cup (2 sticks) unsalted butter
1 cup granulated sugar
3/4 cup brown sugar
1 tablespoon pure vanilla extract
2 1/2 cups all-purpose flour
3/4 teaspoon baking soda
1/2 teaspoon salt
1 large egg
1 large egg yolk
1 cup chocolate chips
1/2 cup dried sour cherries
1/3 cup shelled pistachios

Preheat oven to 350 degrees F.  Line a baking sheet with parchment paper.

Melt butter in a medium saucepan over medium heat.  Continue to cook, watching carefully, as the butter starts to crackle and foam; remove from the heat when browned bits begin floating to the surface.  Immediately pour into a heatproof bowl to prevent it from cooking further, and set aside.

In a medium bowl, whisk together flour, baking soda and salt.  Set aside.

In the bowl of an electric stand mixer, fitted with a paddle attachment, measure granulated and brown sugar.  Add the brown butter and beat together.

Add the egg and egg yolk and beat on medium speed until the mixture becomes smooth.  Add vanilla extract and beat.

With mixer on low speed, add the dry ingredients.  Beat until just incorporated.  Remove the bowl from the mixer and fold in the chocolate chips, cherries, and pistachios by hand.

Drop rounded tablespoons of dough onto the prepared baking sheets.  Bake for 10 to 12 minutes, until golden brown around the edges; don’t overbake.  Remove from the oven.  Allow the cookies to cool on the pan for 5 minutes, before removing to a wire rack to cool completely.

Posted in Uncategorized | Leave a comment

Guajillo Garlic Lime Sauce

This week is off to a refreshingly slow start, thanks to a day off for the Boston Marathon on Monday–apparently that’s kind of a big deal–and an inexplicably short shift at work today.  This has given me a rare chance to consider ways I’d like to spend my spare time, other than sleeping.  I’ve decided that I want to institute office hours, like professors have.  Never mind that none of my jobs at the moment require any kind of desk time whatsoever, except for blogging.  (It doesn’t have to be profitable to be my job, right?  I can put this on my résumé?)  It would just be so nice to have a few set hours every week to sit down and take care of things that I normally can’t, like monitor my bank account from something other than my phone, put some serious effort into job hunting, and follow the news like I used to do at my desk job.

But who am I kidding?  I’d probably just spend my office hours surfing other people’s blogs and wasting time on Pinterest and Art of the Menu.  Honestly?  Even now, as I was typing that last sentence, I decided to fetch the URLs for those links and ended up going off on a 20-minute web surfing tangent.  Forget it.  I’ll just stick with cooking; it’s a far more productive use of time.

This is a recipe that has been with me since my very early days of cooking in my parents’ kitchen.  But only in the last several months, after acquiring my very handy food chopper, have I really started making it in regularly.  A word of assurance for those who don’t like spicy food: never fear, because guajillo chiles are not hot at all.  And for those who do prefer a little fire in their food, red pepper flakes will solve that for you.  Everyone’s happy.

The key ingredient in this sauce is, of course, the guajillos.  I bought them for the first time at a small tienda in my hometown, where the employees were very amused by my feeble attempt at speaking Spanish.  These days, I think guajillos are easier to find (I’m pretty sure I even spotted them at WalMart once), especially if you live in an area with a Whole Foods or Fresh Market.  Or you could just visit a tienda yourself.  As I’ve mentioned before, visiting ethnic markets is a fun and rewarding cultural experience.

You’re also going to need a ton of garlic.  I have to confess, once again, that I cheat on my do-it-yourself, make-it-from-scratch standards here, and I use bottled minced garlic.  Would this dish taste better if I peeled and minced a couple heads of garlic by hand?  Probably.  Would I be in a good mood afterward?  Doubtful.

The first thing you’ll want to do is fry your guajillos in hot oil.  Frying things is dangerous enough without getting a camera involved, so there are no photos of this step.  Just put your oil in a medium-sized saucepan, and let it heat over a medium flame.  If you have a candy thermometer, you’ll want the oil to reach 350 degrees; if you don’t have one, I’ve found that a good trick is to let the oil heat, then drop in a grain of uncooked rice.  If it immediately bubbles to the top, your oil is ready to fry.  Using metal tongs, lower a guajillo into the oil, and let it fry for about five seconds.  You may have to flip it over once if it isn’t completely submerged in the oil. Repeat the process with two or three more guajillos.  The chiles will unfold and inflate in the hot oil; wear an apron and stand back so you don’t get spattered.

Remove the oil from the heat and allow it to cool down a little bit.  This would be a great time to juice a couple of limes, since the chilies need to drain for a minute, too.

When the chilies are cool enough to handle, cut off the stems and then cut the remaining portions into small pieces.  You can decide whether to leave the seeds in or not.  Again, these truly are not hot peppers, so keeping the seeds in won’t make your sauce any spicier.

If you don’t have a chopper or food processor, I’d highly recommend that you get one. (Check the link above!  A mini chopper is not expensive!)  But a blender might also work, as would a coffee or spice grinder.  You’ll want to chop the chilies down into small flakes, like so:

By now, your oil should still be hot, but not scalding.  Pour in your (ridiculously large quantity of) minced garlic.  Return the saucepan to a medium flame and cook the garlic until it turns golden.  Remove from the heat and add the lime juice, chili flakes, and some salt.

And you’re done!  Ideally, this sauce needs to sit for several hours so the flavors can marry, but it’s probably pretty delectable fresh out of the pan, too.

This sauce is excellent for dipping crusty bread as an appetizer or snack.  But if you’re feeling fancy, cook up some angel hair pasta and pan fry some shrimp, and toss them both together with your fantastically smoky, garlicky chili sauce, and pair with a dry white wine.  Instant date night!

Seriously.  These are all the “office hours” I need.


Guajillo Garlic Lime Sauce

3/4 cup olive oil
3 whole guajillo chilies
3/4 cup minced garlic
5 tablespoons fresh lime juice
1 teaspoon salt

Heat oil in a medium saucepan over medium heat to 350°. Using metal tongs, submerge 1 chile into oil, and cook 5 seconds; remove and drain on paper towels. Let cool 5 minutes or until completely cool. Repeat with remaining 2 chiles. Remove and discard stems. Process remaining portion of chiles in food processor 30 seconds to 1 minute or until crumbled into small flakes.

Cook garlic in hot oil in same saucepan over medium heat, stirring occasionally, 3 to 4 minutes or until golden. Let stand 5 minutes, then stir in chili flakes, lime juice, and salt.


Posted in Uncategorized | Leave a comment

Pick-me-ups.

I’ve been down in the dumps a bit lately.  Not sick, not lovelorn, not even depressed, exactly… but just a little blah.  This is for a number of very legitimate reasons, but none that I’m going to discuss here, because I insist on making this blog a place for uplifting things rather than downers and rants.  And furthermore, since I think we can all agree that using food as a means of solving our problems leans pretty strongly toward the bad end of the idea spectrum, I’m not even going to write about food today, if I can help it.  I’m just going to share several non-edible things that cheer and console a case of the blues.

1. Let’s begin with the blues.  We’re talking about wailing, gut-wrenching, classic blues, preferably experienced via the scratchy sound of old records.

You might think this kind of thing would make your bad mood even worse.  Not the case.  Listening to the blues is kind of like a primal scream; it acts as an outlet for all your pain and frustration.  And if you don’t believe me, just ask Cliff Huxtable.  And if you’re just not into the blues–although I highly doubt that’s even possible– maybe you could try the Avett Brothers.  That always works for me, too.

2. Without fail, the Boston Public Library always cheers me up.  The library is my go-to remedy when financial woes are getting me down.  I’ll just drop by and pick up whatever strikes my fancy– and the BPL has everything you could possibly want.

Here’s my most recent library haul.  Yes, almost all of them are cookbooks.  Almost all of them are focused on sweets.  I’m comfortable with that.

I also picked up this gem a few weeks ago.  It was quite possibly the most adorable thing I’ve ever held in my hands (with the obvious exception of my nephew).


Also, the BPL has a beautiful courtyard where you can sit and read your free books, and drink a cup of coffee from their cafe, if you can spare a couple dollars.  The amazing thing about the courtyard is that it is literally steps away from the hustle and bustle of Copley Square, but you can’t hear a thing when you’re tucked away.

3. I can tell you about my favorite dishes without really talking about food, right?  Ok, probably not.  But seriously– when I can’t seem to muster the energy or the money to cook the way I want to, having dishes I love somehow makes that ok.

Well over half of my dishes are vintage.  Imagine that you had an aunt who had been collecting antiques since before you were born, and when you got ready to move into your first real apartment, she told you to bring your car to her house and fill it up with whatever you wanted.  That’s pretty much what happened to me!

The craziest part is that I didn’t bring even close to everything she gave me to Boston, so the rest of it is at my parents’ house in my cedar chest.  I don’t even remember most of what I left behind, so I’m saving it for myself for some future milestone.  It’ll be just like Christmas!

I also love aprons.  I wear one pretty much every time I cook, and I frequently forget to take off my apron when I sit down to eat.  They just make me feel legit.

We also have this one that simply says “shorts.”  I have no idea what that means, or where the apron came from.  It kind of reminds me of Frank Rossitano’s hats.


4. One of the very best things about living in Boston is the huge number of green spaces.  There are so many places you can go and put your feet in the grass, or watch the sailboats drift by, or just prop up against a tree and people-watch.  My three favorites:

The Esplanade, overlooking the Charles River and Cambridge; the Prudential Center courtyard; Jamaica Pond.  The beauty of the Pru courtyard is that it’s right where I work, so I have a mini-escape waiting for me anytime I go on break.

5. This picture:


These are my maternal grandparents, Grandmother and Jimbo.  I adore everything about this picture.  The car.  The house in the background.  Everything Grandmother is wearing.  Jimbo’s skinny belt, and the way he’s looking at her.  They were about my age when this was taken, I imagine, so it’s become particularly special to me lately.  Alex often picks on me (lovingly, of course) about my great pride in my family; he’ll pump me up for unpleasant tasks by saying things like, “Suck it up, lady.  Strong woman, line of strong women!”  But it’s totally true, and this photo reminds me of that.

6. If you’re extremely sensitive to sweetness, you might want to leave now.  Thanks for joining us!  But I’m going to try to keep this as low-sap as possible.  Here goes: Alex always, always makes a bad day better.  When I have a legitimate complaint, like, “I didn’t get that job I wanted,” or “Holy crap, I only have a dollar in my bank account,” he responds with genuine sympathy.  But when it’s something stupid, like, “We’re out of cereal and I only had enough coffee for one cup instead of my usual three,” he has this ability to make fun of me in a way that makes me realize I’m being ridiculous but somehow does not infuriate me, as one might suspect.  It’s uncanny.  It never fails.  He’s amazing.

He’s the one on the right, although I certainly love Sean, too.

And impromptu thing-that-cheers-me-up number 7: writing about things that cheer me up.  Works every time.


Posted in Uncategorized | 4 Comments

Spicy Sriracha Popcorn

If the saying “you are what you eat” is to be believed, I think I can safely say that, in addition to coffee, spinach pesto, and Chipotle burritos, my body is composed largely of popcorn.  I’m not even kidding– I eat popcorn on a near-daily basis, a habit which has its roots in my childhood, when my mom, brother and I shared a bowl of popcorn every single solitary day after school, usually while watching the Animaniacs (so. incredibly. hyper).

Of course, all the popcorn I ate as a kid came out of a bag in the microwave, or on rare occasions, from the machine at the movie theater.  Consequently, I spent the first twenty-something years of my life with no idea how to make popcorn that didn’t come pre-buttered in a bag.  But one day a little over a year ago, my dear friend Joe introduced me to the world of stovetop popcorn, and that pretty much clinched it for me.  Popcorn for me, every day, from here on out.

Stovetop popcorn is incredibly easy to make.  (Did you see that one coming?)  And while I still think the microwaveable stuff is the bee’s knees, especially for moms whose kids are strung out on hyperactive cartoons, the old-fashioned stuff comes with the benefit of total control.  You decide how much you want to make, how much butter you add (if any), and what kind of toppings you want.

This particular topping combo was the result of an intense food craving.  I might have lately hinted at the fact that my life is work, work, work all the time these days, and that work typically lasts beyond what most would consider a normal dinner time.  And on a lot of nights when I make it back to the apartment at 9:30pm or later, all I can really muster up the energy to cook is a big bowl of popcorn.  I see this as a pretty reasonable late-night dinner.  It’s a great source of whole grains, at least, which is more than I can say for a bowl of ramen.  But on one particular night, I was hankering for something spicy and flavor-packed, without the effort of cooking a big meal or the expense of takeout from the local Thai place.  Thus, this spicy popcorn was born.

As you can see from the near-emptiness of the bottle, Sriracha is kind of a big deal in our apartment.  Old Bay seasoning is a relatively new addition to our spice cabinet, but it reminds me of low-country boils and Cajun food.  Mmmm.

Stovetop popcorn is so easy that, once again, there really is no recipe.  Take a pot that looks like it will hold about the amount of popcorn you want to eat, and make sure it has a lid that fits.  Pour in enough oil (olive, canola, whatever you have) to easily cover the bottom of the pot, and then pour in enough popcorn kernels to make a single layer.  Note that they aren’t submerged in oil, just nestled in cozily.

Top the pot with a lid and turn the stove on to medium-high.  Let the pot sit until you hear the first few kernels pop, and then, using oven mitts, hold the lid onto the pot and give the whole thing a few gentle shakes.  You just want to keep the popcorn moving around so none of it sits too long on the bottom and burns.  Continue cooking, shaking the pot every few seconds, until the popping slows, then turn off the burner.  Lift the lid to let steam escape, but watch out, because a few more kernels may still pop after the heat is turned off.

For my spicy version, I melted about two tablespoons of butter (ok, I actually used Earth Balance), and stirred in maybe 1/4 teaspoon of Sriracha– a little goes a long way.  After the popping had subsided, I poured the butter-Sriracha mixture into the pot with the popped corn, replaced the lid, and gave it a good shake to coat.  After I poured the whole mixture into a bowl, I shook on the Old Bay seasoning like salt.  Err on the side of too little Old Bay, though, because too much might make your popcorn a little bitter.

The possibilities for dressing up popcorn are endless, really.  My favorite, favorite popcorn topping is Cabot cheddar, even if it is impossible to find in stores.  Another surprisingly delicious addition is dried seaweed, in the tradition of Hurricane popcorn, a Hawaiian treat introduced to me by my friend Terence.  You can use pieces of cut-up Nori to make your own, or use Bragg’s blend of seaweed and herbs to add an extra kick.  Happy snacking.

Oh, and one other little thing that I nearly forgot to mention.  Last Saturday, I hopped down to New York, took in the city, visited Brooklyn for the first time, and… let’s see, what else did I do?  Oh, right– I totally met Joy the Baker.


And so did hundreds of other people.

This was after Alex and I decided to leave and come back in an hour, in an attempt to let the crowd die down a little bit.  It didn’t work; the crowd had simply changed faces by the time we returned.

What you can’t see in the photo above is the line of chairs along the far left wall, where a bunch of boyfriends who had obviously been dragged along sat and stared hopelessly at their girlfriends, who were somehow still stuck in the back of the crowd.  At least Brooklyn Brewery had provided tons of free beer, and there were heaps of Joy the Baker goodies to snack on.

But there you have it– after months and months of reading, and a few hours of waiting, I finally met my blogging hero.  Can I officially call her my friend now?  I think I will.

Posted in Uncategorized | Leave a comment

Apple Cherry Pie

I made a pie several weeks ago, which I intended to blog about right away.  I thought to myself yesterday, “You know, it’s been a few days.  I really should work on that pie post.”  And then I realized that it was the 26th, and I had made that pie right around the 14th of March.  I remember this because my roommate pointed out that I had made a pie on Pi Day, a coincidence that hadn’t even occurred to me.  (I’m pretty sure I had overheard talk about “Pi” all day, and my brain translated it into “must bake fruit pie.”)  I somehow managed to let twelve days slip by practically unnoticed… I should really slow down more often, but even as I sit here, I’m eyeing the clock to make sure I get ready for work on time, and thinking about what I should pack for lunch, and whether I should just slack off and wear jeans today, and how many days until payday, and will I have time to make a grocery run this morning… sigh.  Sometimes life is just hectic.

Pie is actually the perfect thing for hectic times like these.  The ratio of rewards to effort is easily in the ballpark of about 10 to 1… if you want to get all mathematical about it.  (We did just talk about Pi day, after all.)  You really don’t even need a recipe, unless you plan on making your crust from scratch… which I didn’t.

I just chopped up three apples, tossed them into a skillet with some butter and brown sugar, and added a couple handfuls of dried cherries.  I probably threw in some spices, too… I think I used cinnamon and coriander, but twelve days have kind of wiped away the details.

When the cherries had absorbed some of the liquid in the pan and plumped up a bit, I poured the mixture over one sheet of rolled out crust, topped it with the other crust.  I used a fork to seal the two crusts together, leaving me with something that looked like a giant, lumpy empanada or something.

Here Alex demonstrates the proper way to cut into a pie:

And there it is, a simple, humble, delicious slice of pie.  No frills, no scoop of ice cream… just flaky crust and sweet, fruity filling.  It’s worth sitting down for… if you can spare the five minutes.

Posted in Uncategorized | Leave a comment

Homemade Mochi

When we were in 5th grade, my best friend Kristine went to visit her family in Japan.  Despite the agony of her being gone for two whole weeks (even though this was the year we were in separate classes, separate lunches, and separate recesses, and only saw each other long enough for a two-second wave in the hallway every day), it was well worth it when she brought back tons of photos, presents, and botan rice candy.

The main thing I remember about botan rice candy was that it was wrapped in a piece of plastic, like most candy, but underneath that, it was wrapped in edible rice paper.  I’m pretty sure I ate the rice paper more for the novelty than for the taste, because it became a slimy mess in about half a second.  But the candy underneath that rice paper was delectable.

It’s been several years since I had a piece of botan rice candy, but when I moved to Boston and got caught up in the tart frozen yogurt craze, I stumbled upon something called mochi, a Japanese rice cake with a sticky, candy-like texture similar to botan.  All the frozen yogurt joints offered tiny pieces of mochi as a topping, and I fell in love after my first taste.  I soon found myself going to Red Mango less for the yogurt and more for the mochi, but I couldn’t figure out where I could buy some to snack on.  After searching for a while with no success, I decided to go out on a limb and try to make some myself.

I started out with a trip to C-mart, an Asian grocery on the edge of Chinatown.  This was easily the most fun part of the process; I spent a good hour in there just gawking at the pretty dishes, endless varieties of frozen dumplings, and stacks and stacks of tea, including this particular treasure:

“Jasmince” tea is delectable with mochi, by the way.

I feel like I say this about every recipe, but mochi is really easy to make with a little bit of effort.  These are the only two ingredients that you might have trouble finding: mochiko (glutinous rice flour) and katakuriko (potato starch).  As you can see, they’re available on amazon, but if you have an Asian grocery in the area, just go check it out!  It’ll almost certainly be cheaper, and even if the associates don’t understand you, just chalk it up to a fun multicultural adventure.

To make the mochi batter, you’ll whisk together sifted mochiko, sugar, coconut milk, and water.  Apparently mochi traditionally comes in several colors, but I prefer to leave mine plain (that’s the way it comes at Red Mango, and I don’t argue with Red Mango).

Next, you’ll line a baking pan with foil, and—this step is crucial—spray the heck out of it with Pam.  Learn from my mistakes, all ye would-be mochi makers; if you forget to spray the foil with Pam, pour the batter back into the mixing bowl, toss the foil, and start over.  Does this seem like a hassle?  It’s nothing compared to the hassle of trying to peel un-sprayed foil off a sticky mochi cake.  Truuuuust me.  You’ll also want to put another piece of Pam’d foil on top of the mochi (and I mean directly on—make sure it’s all in contact with the mochi batter.

After the mochi sits in the oven for an hour, and cools for another hour, you’ll peel back the top layer of foil, and dust the mochi with potato starch.  And when I say dust, I really mean smother.  You’re going to invert the whole thing onto a potato starched surface, but it’s really sticky (had you picked up on that?), so the more potato starch, the better off you’ll be.

Once the mochi is de-foiled, you’ll cut it into small cubes, and toss them in a bowl of potato starch.  Use a fine-mesh sieve to shake off the excess potato starch, leaving just enough on the mochi to keep them from sticking together.

Be warned: mochi is not only highly delicious, but also highly addictive, and this recipe makes a ton.  Invite some friends over, and you’ll polish a batch off in no time… or just chow down on the entire batch with your roommate and a Nora Ephron flick.  You know, whatever works.

Homemade Mochi

1 lb Mochiko (glutinous rice flour)
2 1/2 cups sugar
12oz. canned coconut milk
1 3/4 cups of water
Katakuriko (potato starch) (cornstarch is also a substitute or variation)

Preheat oven to 325ºF.

Sift the mochiko into a large mixing bowl, and add the cups of sugar.  Add the coconut milk and water, and stir with a whisk until there are no lumps in the batter.

Line a baking pan with foil and spray the foil generously with cooking spray.  Cover the mochi with another piece of cooking spray-coated foil, making sure the foil is touching the batter.

Bake for 1 hour in the middle of the oven; after cooking, allow mochi to cool for at least one hour, then carefully remove the top layer of foil.

Dust a work surface with potato starch, and invert the mochi onto the work surface.  Carefully remove the remaining foil from the mochi, working slowly, as the foil will likely try to stick.

Cut off the dried bits from the edges, then cut the mochi into small cubes.  Toss the cubes in a bowl of potato starch, then shake them in a sieve to remove excess starch.

Snack away.


Posted in Uncategorized | 1 Comment